Category Archives for "Classroom"
I love this questioning and review activity, is it perfect for the Spring and Easter season to bring a little fun to my classroom.
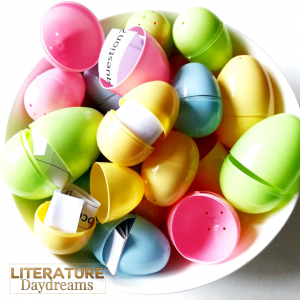
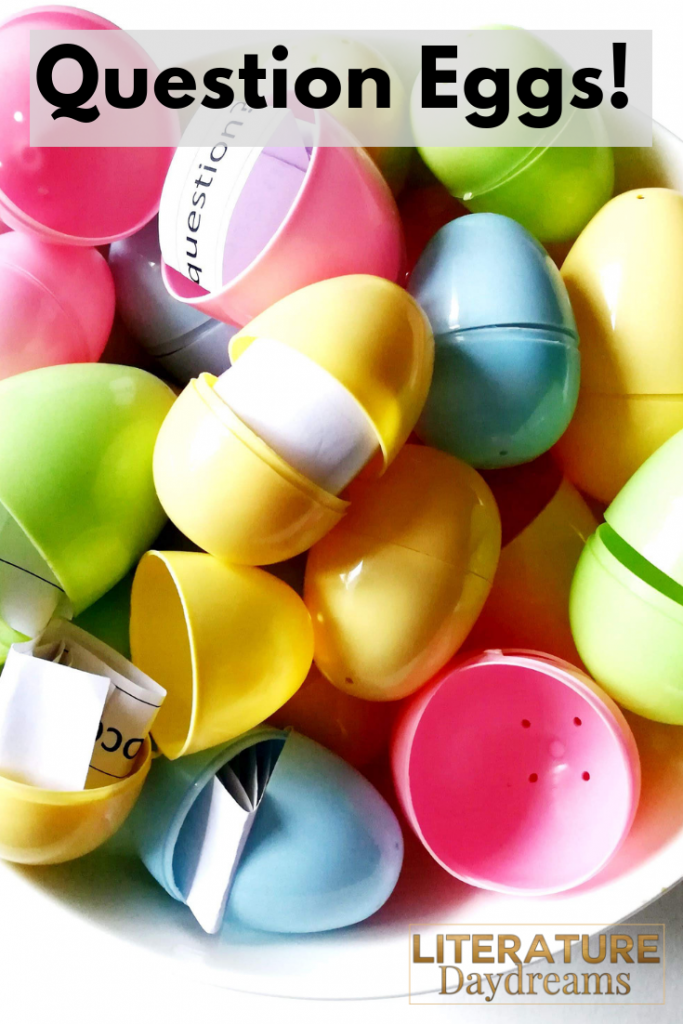
It’s about this time of year that supermarkets and pound (dollar) stores fill up with Easter goods. These little plastic eggs are a fabulous and cheap addition to your teacher-toolkit! They are great because the eggs come in 2 halves so you can put stuff inside. In my local store, you can buy a set of 12 plastic eggs like this for £1.

So as you can imagine, I have a whole load of them.
Place a different quiz question in each egg. Pass them around and get students to answer different questions from different eggs. All you need to do is to make a list of quiz questions on one page. Print and cut them into strips. You can create enough so that everyone has a different question or you can double up and have two sets circulating at once. This is a great way to review material in a low stakes test.
Fill some eggs with rewards and some eggs with challenges to generate a little bit of engagement in your activities.
Break up your new learning/information and place it into several eggs. Then get students to do an egg hunt to gather all the new information. So I would create 10 slips of paper with our new learning on. You can’t fit big pieces of paper in these eggs so you have to be concise. One strategy would be to number the slips and have students make sure they’ve gathered all of them. Or you could challenge your class by telling them there are 10 pieces of new information, they have to find them all and then get them into the correct order.
If you are teaching a text, then you could place quotations or textual references in different eggs for students to analyse.
For a writing task, you could place new vocabulary, writing techniques, different sentence structures into the eggs and students to self-select to create a success criteria or rubric for their own writing. I might choose to be a little more structured and include specific elements I want to see in writing. For example, one might say ‘simile’, another ‘metaphor’, another ‘personification’. I might also include instructions like ‘an 8-word sentence showing emotion’. Another might state ‘a character with a sinister motivation’. I have these in a huge bowl at the front and I ask the class to take 3 – 4, then they write these down as their success criteria. They can then return them and choose more.
Introduce new vocabulary by placing sentences on slips into the eggs. The new vocabulary word could be in capital letters. Students have to work out the meaning of the new vocabulary from the context of the sentence.
As you can see there are loads of different ways that you can use these plastic eggs in your classroom, just to add a little bit of fun and variety to your learning.
So if you see them in the shops this Spring, I would highly recommend picking while they are there! If you would prefer buying them online, then you can find them here:
US Amazon* UK Amazon*
*These are affiliate links. This doesn’t mean you pay any more or any less for the items shown. The price stays exactly the same. It does mean that I get paid a small commission if you buy these items using my link. It’s just enough to keep me going in cups of tea.
This activity is great to use with any class and almost any topic area. It makes sense, doesn’t it? To mix words and visuals to aid memory. Our students now need to memorize and to retrieve information for testing than ever before. Dual coding is one way to help students remember.
Dual coding is combining 2 ways that the mind remembers things – most commonly in the classroom – this is words and visuals.
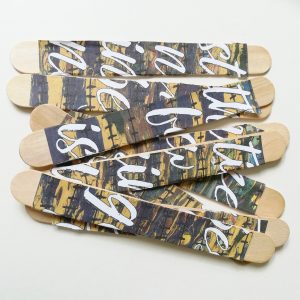
Here you can see the beginning of Hamlet’s famous soliloquy “to be or not to be”. The challenge for students was to come up with as many visuals to replace the words in the speech as possible. They could be as creative as they liked – as long as they could read the whole speech based on what they produced. You can see the word “whether” is replaced by the sun and cloud and the word “suffer” is replaced by a sofa! The aural closeness of these words is the memory trigger.
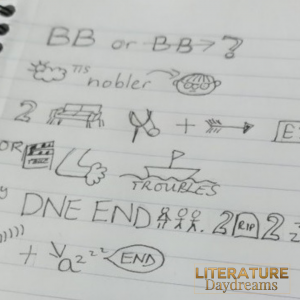
This activity isn’t a quick crafty task or something for a Friday afternoon. It took my students a good hour to think through each word in the speech and then work out how to visualize it. This close attention to the text is just another memorization technique. The very work of recreating it, helps us remember it.
I first did this activity with a group of students 5 years ago. They are now in their final year of education and English hasn’t been compulsory for the last 2 years. But when I see these kids around the school – they still love to show off for me how much of this soliloquy they can remember. So they have been through 4 full school years since they learnt this speech and they can still remember it. Dual coding works!
I teach symbols and literary devices when I am covering creative writing – we use them as marking codes as well. Then we also use the same codes for our literature units. Then we layer them up as we read through the text. Does that make sense?
If you are looking for other fun and engaging activities to use in your ELA classroom, why not check out these blog posts:
Also, each week I send an email out to my teacher-friends, in this message, I include one classroom activity (like the perfect review game) and one literature activity (like this blackout writing activity). They are always fun, engaging, and designed to create brilliant learning moments for your students. If you would like to receive this weekly email (I send it on a Sunday morning – ready to help stave off those Sunday scaries), then all you need to do is fill out the email sign up below!
Sign up below to receive regular emails from me jammed packed with ELA teaching tips, tricks and free resources. Also access my free resource library!
Teaching teenagers can be hard. Teaching teenagers who are disinterested, disengaged, and even (sometimes) disruptive can be really hard. So here are my two go-to strategies for when things are getting a little sleepy or even a little feisty in my classroom.
The two ideas are called: the class coach and the student helpline!
I love this activity and use it regularly with both younger and older students. It’s great to use at any point in your unit of learning, but I especially like to use it on a day when we are tackling something tricky.

The simple is very simple. One student becomes your class’s coach (football, hockey, swimming – whichever works for you) for the lesson or day. They are responsible for encouraging the team and keeping them focused. It is just that though because the class coach has to keep everyone on their best game throughout the lesson, they have to be fully engaged. They have to watch what’s going on, they have to see who’s winning, and who needs to support.
I hope it’s easy to see what the benefits of this activity are. It can take a while for my students to get the hang of doing a great job. I have to model what I want them to do – I generally do a whole session based on this as I am getting my classroom routines sorted at the beginning of the year. However, once they have nailed it. The class coach is something that students are begging to be.
Here is why I love it: it increases engagement, especially for the coach; it increases positivity because there is always something good about getting a shout-out and recognition; it gives the students a voice – and often what they see, I might not have seen.
Try it out a few times and let me know what you think!
I also love this activity! And thankfully, it is super easy to explain. The idea is another very simple one: create a helpline in your classroom. You can use this activity at any point in learning as a quick recap or to generate more discussion. This year, I am adding a fake phone to my classroom to help!

Obviously, this can be a whole class activity, where every student is sitting back to back. Or if you prefer you can have a student volunteer to man the helpline. They can come and sit at the front of the room, then other students can take it in turns to ask them questions.
This is a fun and engaging activity. It usually starts and ends with laughter. Yet there is a clear learning purpose involved. Students are practicing reforming their knowledge and understanding, these synthesis and summarizing skills are important.
Drop me a comment below if you try these ideas out and let me know how they went!
If you are looking for other fun and engaging activities to use in your ELA classroom, why not check out these blog posts:
Also, each week I send an email out to my teacher-friends, in this message, I include one classroom activity (like the perfect review game) and one literature activity (like this blackout writing activity). They are always fun, engaging, and designed to create brilliant learning moments for your students. If you would like to receive this weekly email (I send it on a Sunday morning – ready to help stave off those Sunday scaries), then all you need to do is fill out the email sign up below!

Sign up below to receive regular emails from me jammed packed with ELA teaching tips, tricks and free resources. Also access my free resource library!

This review game is perfect to help your students demonstrate their learning for any literature text. You can use it while reading a text or after reading to have your students prove their learning.
In this blog post, I’ll show you:
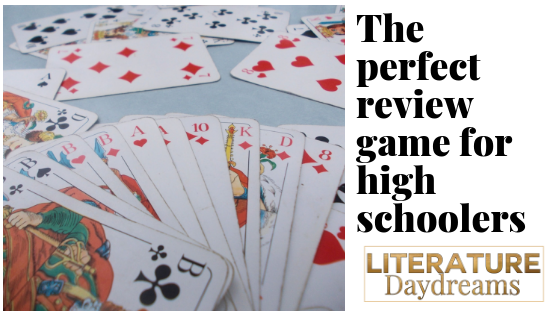
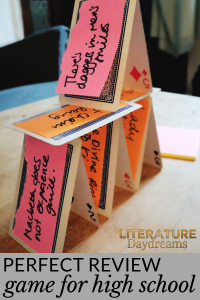
The basic idea is that students build a card tower. The catch is that each card on their card tower has to demonstrate their knowledge of the ideas, characters, and the plot of a text.
It would be too simple to build a card tower with just information on it. Nope – that’s not enough for us. Here’s what the key to the challenge is: Each card has a sticky note with information on it. But each sticky note has to link to every other sticky that it touches in the tower.
In the image below, each card in lower zigzag pattern touches. The cards that touch either at the top of the V or at the bottom of the V have to have information on that connects.
So the sticky that we can see on the lower level states “Macbeth does not experience guilt”. This means that the card propped up against it must link to that idea. Perhaps with a quotation that proves this, or a reference to an event that links to this idea.
Even more challenging – the cards that make the horizontal support across the lower level also have to contain facts and information that link the ideas on the cards!

The overwhelming benefit of this game is that students have to think and think hard about all the ideas they wish to demonstrate before they try and construct their card tower. The tower itself becomes secondary to their knowledge and learning.
As this is a literature review game. So your students will need to know about your text. It is essentially a 3D game of dominoes. Here are the instructions I give to my students:
The first time I use this review game, students get all caught up with what is and isn’t allowed. So I give them this example. Here’s is what a sticky notes series might look like from Macbeth Act 1, Sc 1:
Plot – Macbeth fights bravely against rebels trying to overthrow King Duncan –
which links to – Character – Macbeth is shown to be bloodthirsty and violent from the outset – which links to – Theme – The theme of rebellion is introduced as Macbeth is given the rebel’s thaneship – which links to…plot! But this time because the theme is rebellion – you could include anything from the plot on rebellion!
[social_warfare]

Sign up below to receive regular emails from me jammed packed with ELA teaching tips, tricks and free resources. Also access my free resource library!

As I got ready to ‘go back to school’ this autumn, I found myself tempted to buy all-the-things. I work hard to control my spending impulses, after all, I already have too many things in my classroom. I don’t need anything more, really I don’t.
So this year, I decided that I would choose 5 things I used (or loved) the most in 2017. And so, here’s my list… enjoy!

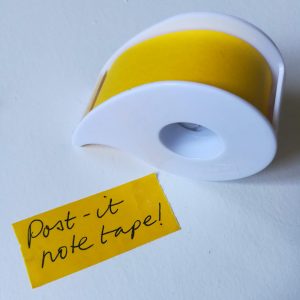
Every teacher loves a post-it note, right?! Well, I ADORE post-it note tape (see below). I use this tape for a thousand things. I use it to move to-do items around in my planner; I put notes on my wall calendar; I use it to annotate texts; leave notes on students’ work and desks. As this tape is ‘tape-shaped’; it has the advantage of being smaller than a post-it note and it is sticky all the way across so there is no chance at all of it being lost!
These are the links for post-it note tape:
UK link https://amzn.to/2AJAlXW USA link https://amzn.to/2M1W8ic
Please note these are affiliate links. You should know that this item will not cost you any more or less than it would if you found it through the usual search function. I do receive a small commission for anything your order using these links.
I know, I know, these paper clips are not entirely sensible. But I love these cute paper clips. I have 100s of them and use them for everything from tagging papers for grading together, to handing work back to students. There’s just something about using these paper clips that makes me smile.
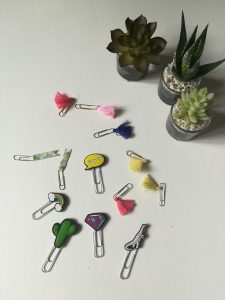
Here are a few of my favourite animal paper clips!
UK link https://amzn.to/2OMCvIF US link https://amzn.to/2Mx34nK
Most of the boards in my room are pretty static throughout the year. I use them to display work on particular ideas or texts we have studied but they don’t change regularly – partly because I don’t have time, mostly because they don’t need to. My students study texts for two years, so the information stays relevant.
However, I do have one board that I change every day. My wire mesh messageboard sits behind my desk and I like to use it to write funny messages for my students. I put up photos, memes, inspiration quotes, and amazing pieces of work. I also use it for our word of the day (today the word was ‘yield’) and for our debate topic of the day.
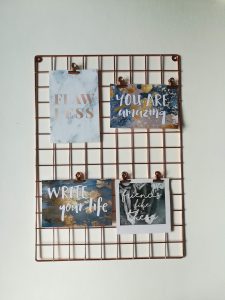
My message board is pretty small. If I bought it again, I would get a bigger one! Check these ones out…
UK link https://amzn.to/2vCSNfg US link https://amzn.to/2M1V8KY
If you follow me on Insta (find me here), it won’t come as a big surprise that one of my ‘essentials’ is a travel mug. I teach a lot of classes. Nine in fact. That’s a lot of talking every day. My ECO cups (yep, plural) are what keep me going. Especially now that it is getting cold and I am wanting warm drinks because the heating doesn’t work!

UK link https://amzn.to/2R8j0vV US link https://amzn.to/2zDZfpo
I use stickers a lot in my classroom. Yep, teenagers love stickers. I use them to track excellent written work, I put them on the back inside cover of the notebooks (so my teen boys don’t get embarrassed) and then I send a positive letter home for every 5 stickers.
So with approximately 220 students coming through my classroom each week, I get through a lot of stickers. And I mean A LOT!
Here are just a few of the stickers I’ve used already this year!

I buy stickers from all over the place. I am an expert at spotting super cheap ones wherever I can. Of course, occasionally that means Amazon is my friend. Here are my go-to online sets.
UK link https://amzn.to/2DEOF5E US link https://amzn.to/2zD4HJ7
I’d love to know what the essentials are in your classroom! Why not drop me a note in the comments below?!


I always need new ways to generate deep and thoughtful debate with my students. This one, is one of my favourites. This activity is called ‘Kill the Question’ and works as a quasi-CSI style lesson where students investigate a ‘question’ and decide whether to ‘kill’ it or ‘resurrect’ it.

My senior Literature class needed to prepare for an extended essay by reviewing some great philosophers. So prior to this lesson, students had worked in groups to research and present on a specific philosopher, or a period of history that saw some great advances in philosophical thinking.
Kill the Question is based on CSI, students gather evidence that enables us to debate on something more than opinion.
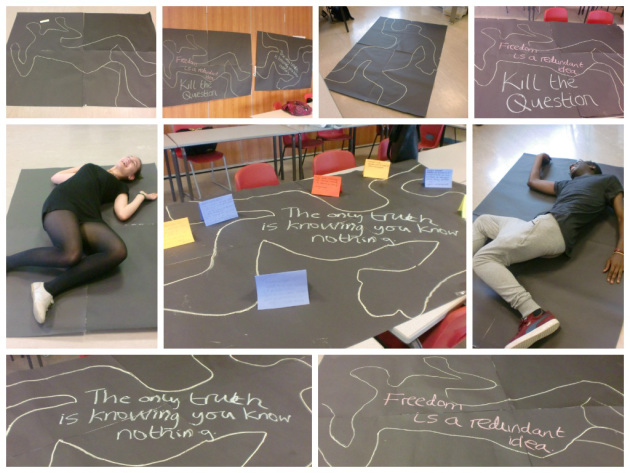
You can see from the image above that we “killed” two ideas: “the only truth is knowing you know nothing”, and “freedom is a redundant idea”.
Once I had introduced the 2 ideas, students returned to their philosopher research groups. I allocated each group cards of a specific colour. They then used their prior presentation work to create evidence for or against this idea.
The students’ evidence was placed around the idea. We then debated it from the standpoint of each philosopher, what they might say to “kill” or indeed “resurrect” this idea.
I found that my students were able to make extended comments because they had prepared. But more importantly, they were able to tackle with the nuances and subtleties in each idea. They weren’t just talking out of their own experience or their own opinion.
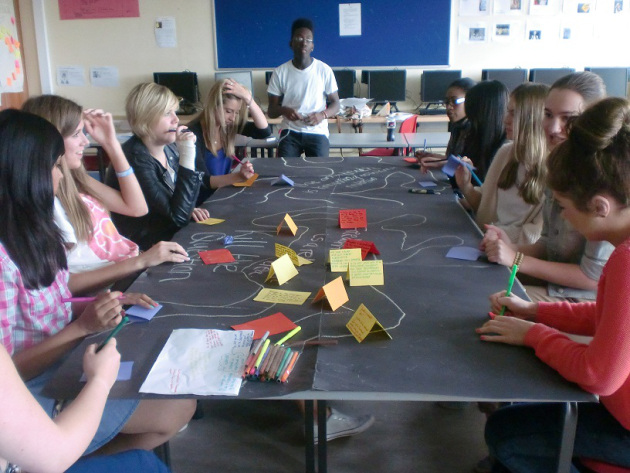
It was then that I realised I wanted to try this activity with my younger pupils.
Speaking and listening is no longer a tested skill for us, but it is so important to develop thinking (and communication) skills. I thought Kill the Question would also be a great way to get my students thinking in more depth about a novel.
After all, think of the connections that students could make – links to themes, character and setting, links to context, links to other texts and writers.
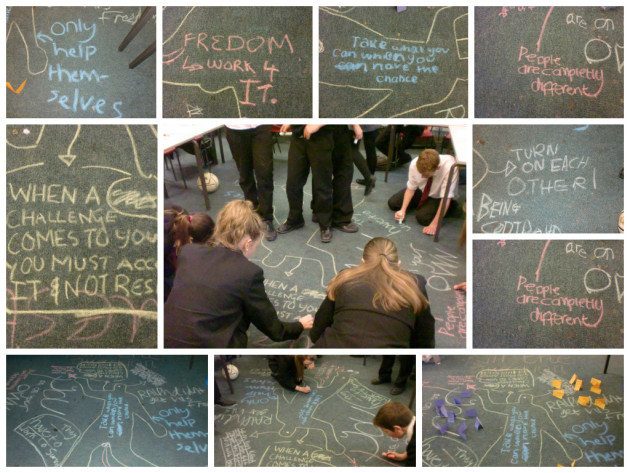
My year 9 students were studying Lord of the Flies and Battle Royale and we took the bold step of using chalk on the carpet in my classroom to create our debate bodies! Note – it did come off eventually, but only I after I scrubbed it…
The idea we killed this time was Malcolm X’s quote: “Nobody can give you freedom; nobody can give you equality or justice. If you are a man, you take it”.
This time students were given different colour evidence cards to represent a variety of approaches to this quote.
To begin I allowed students to write their “first response” to this idea on the carpet in chalk. Another learning point for me here: don’t even bother trying to discourage teenagers from making your dead body anatomically correct!. I was pleased and surprised that I got a full range of responses, not just what they thought I wanted to hear, but what they really thought.
After this, I put students into small groups and gave them each a non-fiction text that in some way added evidence to the idea. I had an in-depth article about the science of the murder gene, another on nature vs nurture, one on dictators and the world history of rebellion.
Students worked together reading this texts, summarising and annotating, then they chose evidence to support or oppose Malcolm X’s idea. Their evidence was placed on different colour cards and placed around the body.
We began to discuss it, we debated every piece of evidence we had gathered so far. Again the results were really encouraging, students were presenting real arguments using a variety of evidence. They had to acknowledge counter-arguments and justify their reasoning.
Finally, I have each student some green cards, I asked them to find evidence from either of the texts we were studying (most chose Lord of the Flies) or from the contextual evidence we had gathered about Golding and Takami. Again, we then together looked at each piece of evidence.
As a class, we weighed it against our own thinking, what we felt to be true and we created a collection we were happy with.
The additional end benefit of this entire activity was that my students had, in essence, planned out an essay. Our cards and debate record became a very detailed essay plan.

This gorgeous reading display is perhaps one of the best things I’ve added to my classroom in ages. And not just because I get to play Carly Ray Jepson songs in class… I cannot claim the idea is mine. But I do adore how it turned out! Here’s how I went about it and how you can swipe the download!
This week I updated the display in one pokey corner of my classroom. It’s one of those things that I had been meaning to do for a-g-e-s. But because the space was generally well hidden by the 5 tonnes of stuff I accumulated last year, it hadn’t been a high priority. Karma happens, though right? We had visitors in school and my classroom needed to be pristine. Or prestige, as my students would say!
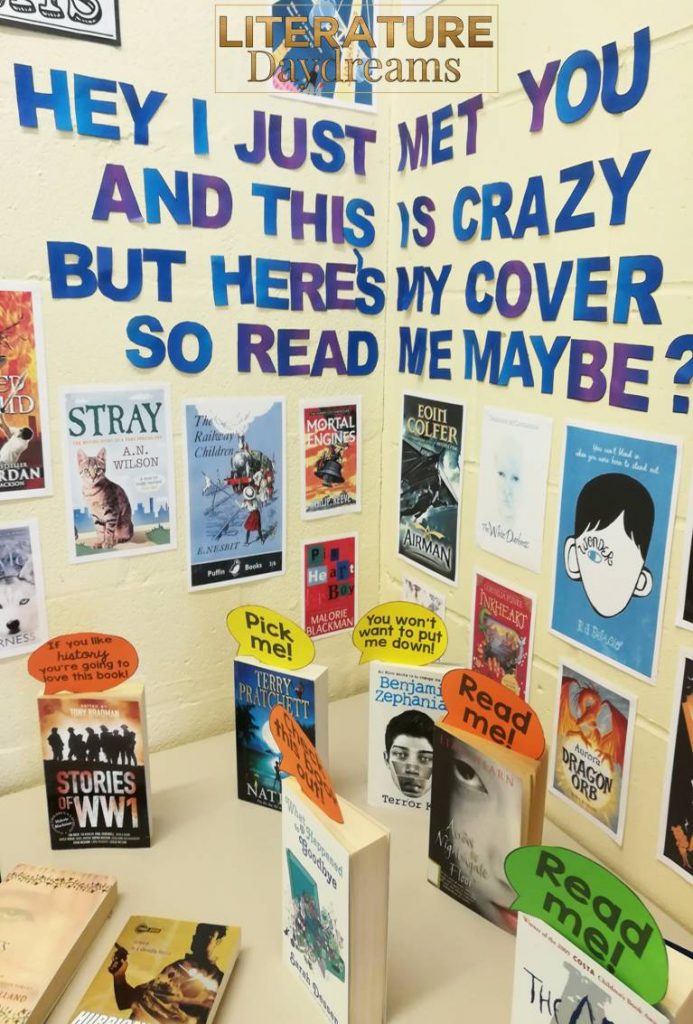
This cute rhyme is a play on Carly Ray Jepson’s song “Call Me Maybe”. All my students ‘got it‘ as soon as they saw the wall. They groaned and shook their heads, enjoying a moment of teenage indignation. I then asked them for their best book suggestions. So it’s their book recommendations, plus a few from my colleagues, that I placed around the rhyme! Read on to see how I made it and to swipe my files!
Before I get into the practical details – I wanted to give a shout out to the amazing Jessica Lawler from Joy in the Journey. Check out the ‘Read me!’ and ‘Pick me!’ labels in my books! Don’t you just l-u-r-v-e them!! They are also a sweet treat of free download, Jessica has them on her TpT store and you can download them for free >>here<<.
Ok, ok. I know what you want. Here is how you can get stuck into this in your classroom. It really is as simple as 1 – 2 – 3.
So all you need to do now is get the SWIPE file!

Love reading in your classroom with this fun reading display! Download your freebie now and click to receive regular ELA teaching tips, tricks, and ideas!
*I send emails with teaching tips, tricks, and free resources to my subscribers regularly. I value your privacy and you can learn more about how I handle your data in our private policy. You can unsubscribe at any time.
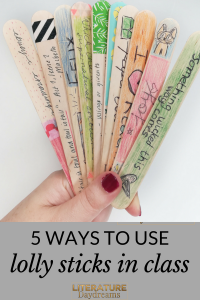
If you’re anything like me, you have drawers or even cupboards of things you have bought for your classroom – just in case. I have about one hundred thousand lolly sticks*. Over the last year, I worked hard to use all-the-things. In the post, I am going to share 5 ways you can use all those lolly sticks in your secondary classroom!
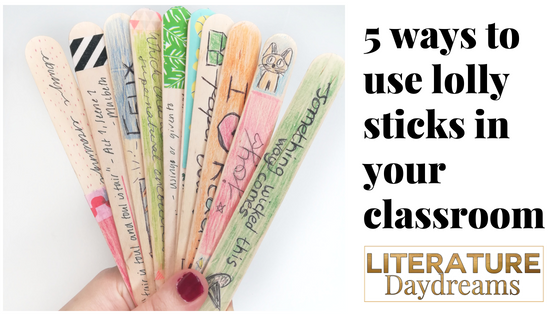
Lolly sticks originally made their way into our classroom as a form of assessment. We wrote our students names on them. Then used them as a simple, low-tech random name generator. Well, they are still great for that purpose. You don’t necessarily need to use them as part of your questioning strategy every lesson. But mix things up using them every now and again.
Hand out the lolly sticks to students at the beginning of the year. Set them a homework to decorate their lolly stick with their name and at least 2 images that show me something about their personality.
I stick them in a cup at the front my room and use them to:
So don’t discount using your lolly sticks for names still!
Another way I use lolly sticks is as bookmarks for our class novels. We generally don’t have enough copies of our class novels to allow students to sign them out and take them home. In fact, often our teachers are sharing class sets of novels between and we have to juggle who is using the books during hour 1, hour 2 etc. I also don’t see my classes every day. In fact, some of my classes are one hour a week classes and I don’t see them except for that one hour.
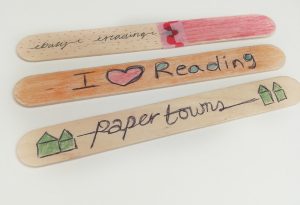
So, bookmarks are one of the things that make my reading teaching easier. I used to use post-it notes and to be honest that was fine. But my lolly stick bookmarks have a two-fold purpose: they make a great bookmark and they can be used as a reading ruler.
It’s an easy and effective way to keep everyone on track. No issues with different page numbers in different editions of the novel and an easy differentiation tool.
I also use them the most for extending and developing student responses to literature texts. Let’s take Macbeth for example. At some point early on in studying the text, I will hand out my unused lolly sticks to the students and ask them to write on them the names of characters, events, settings, themes, and relevant historical context facts. Once I have these I use them in a number of ways:
To take this further, I then start adding lolly sticks with key literary terms on (foreshadowing), with text-specific language (sycophant for example from Macbeth), or with essay writing challenge sentence starters (e.g. another way this could be interpreted is…).
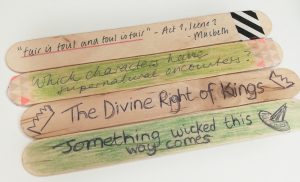
By the end of studying a literature text, I normally have about 150+ lolly sticks to use for any number of quick quizzes, revision tasks, or extension ideas. Even better, when I move onto a new text but want to spiral back to review Macbeth (for example) then I can just grab a lolly stick and ask the class a question.
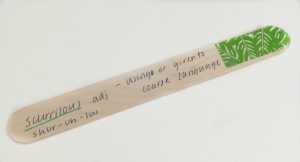
Idea 4 is one that I use throughout the year and I use across multiple classes. Simply, anytime we find a new vocabulary word that we love (last year one class was obsessed with the word incredulous), we write it onto 2 – 3 lolly sticks and put them in our vocabulary post.
The final idea for using up all those lolly sticks is to create puzzles for your students to solve. These are great ice-breakers, quick fixes for when you need 5 minutes, or discussion prompts.
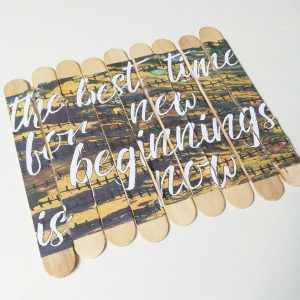
Here’s what I do:
I hope you enjoy using these ideas!
*This post contains affiliate links. If you buy something using one of these links, you won’t pay any more but I will receive a small commission!

Sign up below to receive regular emails from me jammed packed with ELA teaching tips, tricks and free resources. Also access my free resource library!
Pop Quiz! Which of these best fits you?
If you answered “me, me!” to any of these 4 statements, then today’s blog post is dedicated to you. Here are 3 engaging classroom activities that: give your students a chance to debate; challenge students to stretch classroom knowledge to become real world knowledge; and help them link history and literature with their lives!
It’s easy to forget that Guy Fawkes wasn’t the instigator of the Gunpowder Plot, the man and the money behind it was Robert Catesby. A wealthy farmer and Catholic, Catesby persuaded many of his friends that James I was a weak king and could be easily removed from power.
Guy Fawkes, however, was also not the bumbling fool often portrayed in cartoons. He fought in the Spanish wars against the Dutch Republic and was an experienced soldier.
If you and your students are interested in finding out more about Guy Fawkes and the Gunpowder plot – then check out my Guy Fawkes Hero or Villain resource on TpT.
After you have researched Guy Fawkes in detail, use these debate prompts (a sneak peek from above resource) to spark some deep discussion in your classroom.
**Now a big disclaimer is needed here: V for Vendetta is rated a 15 here in the UK. The whole film is not suitable for classroom use.**
How do I use the film in my lessons to help discuss Guy Fawkes then?
Introduce the story: V for Vendetta (1998) is a graphic novel by Alan Moore. The story is set in a dystopian future where the United Kingdom is ruled over by a neo-facist regime. One night, 5th November, a freedom fighter attempts a revolution. He takes over the national media and makes a speech encouraging all citizens to join him the following year (on 5th November) again to start a rebellion.
Watch the clip:
https://www.youtube.com/watch?v=KKvvOFIHs4k
Read the speech and discuss persuasion:
I have attached a file with V’s revolutionary speech here. We discuss rhetoric and persuasion here and compare it to other political speeches. Then we discuss V’s use of 5th November as a sign of positive revolution.
I pose the questions:
In his dystopian novel, 1984, Orwell writes, “who controls the past, control the future” – we discuss this and the truth of it in our world today.

If your students love V as much as mine do then I often let them watch these two extra clips: The 5th of November Overture and *spoiler* the finale scene (note this contains swears) and will also spoil the film for them – so beware!!
One of the best things about nursery rhymes is that they are all pretty gruesome in nature. If they aren’t warding off the plague, they are accusing you of being a witch. The nursery rhyme written for the ‘celebration’ of failed Gunpowder Plot is just as brutal. We study it for ‘historical accuracy’ and rhetorical techniques and then we create our own Gunpowder Plot nursery rhyme. Sometimes we cast Guy Fawkes as the hero. Sometimes a hapless fool deserted by his comrades. Sometimes we write about James and the Lords in Parliament. Occasionally we imagine the horror if it had succeeded. If all else fails – we create a visualization of the original rhyme with lots of gory detail.
Remember, remember the fifth of November,
Gunpowder treason and plot.
We see no reason
Why gunpowder treason
Should ever be forgot!
Guy Fawkes, guy, t’was his intent
To blow up king and parliament.
Three score barrels were laid below
To prove old England’s overthrow.
By god’s mercy he was catch’d
With a darkened lantern and burning match.
So, holler boys, holler boys, Let the bells ring.
Holler boys, holler boys, God save the king.
And what shall we do with him?
Burn him!
Check out this interactive Guy Fawkes game on the BBC History website. Go to the Powder Plot Game here.
If you wanted to get your students debating; brief history and literature into the real world and challenge your students to really think, then this post was for you.

Sign up below to receive regular emails from me jammed packed with ELA teaching tips, tricks and free resources. Also access my free resource library!